

Measuring replacement windows in six steps
Measuring for replacement windows is relatively straightforward, but following the steps below may help you avoid mistakes and get accurate measurements for a proper fit.
1. Measure the window width
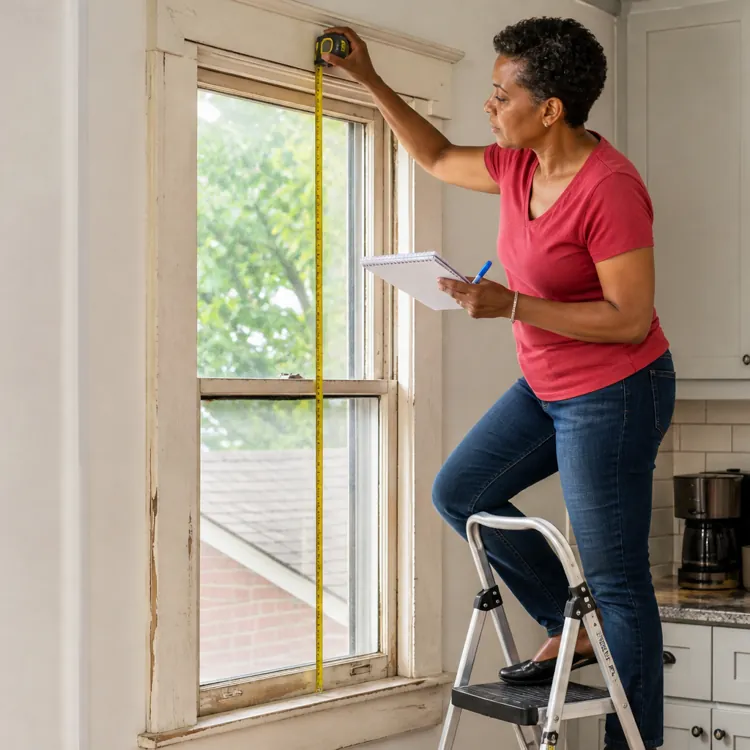
Using a tape measure, find your window’s width from the inside of one jamb to the inside of the other. Take measurements at the top, bottom and middle of your window opening. You’re looking for the smallest of the three measurements.
Use the smallest measurement to account for nonsquare windows, slight shifts or framing imperfections and to avoid replacement windows that are too big for the existing wall opening.
2. Measure the window height
Measure the height of your window from the underside of the head to the top side of the sill. Again, take three measurements: one on the left side, one on the right side and one in the middle. Note the smallest of the three measurements.
3. Measure the frame depth
Next, you’ll measure the frame depth by using your tape measure to gauge the width of the jamb on either side of your window. Measure only the jamb width, and make sure you don’t include trim. Most homes have 2-by-4 framing, so window frame depth will usually only be an issue if your measurement is less than 3 1/2 inches, the standard width of a 2-by-4.
4. Check window opening for square
Measure the diagonals of your window opening from the top left corner where the head meets the jamb to the bottom right corner where the sill meets the opposite jamb. Repeat the measurement from the top right to the bottom left.
A window frame with matching diagonals is in square (meaning it is level and plumb), but most aging windows will be slightly out of square. If your measurements differ by more than 1/4 inch, consider having a professional come in to perform measurements and adjust for the variance.
Alternatively, you can use a level with one end pressed against the jamb, sill or head, hold it level, and measure the distance between the window frame and the opposite end of the level. This will give you an accurate estimate of how far out of square your old window is.
5. Record measurements for ordering
Record all your measurements, including the shortest width, the shortest height, your jamb depth and the diagonals. Replacement window sizes are usually four numbers: The first is the feet of the width, the second is the inches of the width, the third is the feet of the height, and the fourth is the inches of the height.
For example, a 2030 window is 2 feet wide by 3 feet tall, while a 2852 window is 2 feet 8 inches wide and 5 feet 2 inches tall.
Note that these measurements are approximate and don’t reflect the exact size of your windows, but this is the most useful way to express window sizes and order replacements.
6. Consider hiring a professional
DIY window measurements can help you estimate the cost of replacement windows, but consider hiring a window installer to ensure accurate measurements and avoid delays. Many installers include measurements when completing window replacement projects, so it won’t cost you any extra to have a professional double-check your work.
» RELATED: Window installation costs
What you’ll need before measuring
Here’s a list of items you’ll need to prepare and measure windows.
- Tape measure: A good tape measure is the most important tool you’ll need. Choose one with a steel tape blade, if possible, and make sure the end hook and its fasteners haven’t loosened over time from use.
- Level: A level can be handy for measuring how far out of square your windows are.
- Ladder: For windows you can’t reach from the floor, like skylights or clerestory windows, you’ll need a tall, sturdy ladder to access them.
- Safety gear and support: When you use a ladder for measurements, wear shoes with thick rubber soles and consider rubber gloves for better grip. Also have someone hold the ladder steady while you work.
- Notepad and pen or pencil: Have a notepad and pen handy to write down your measurements. Draw a diagram of your window and label it with the measurements for the best results.
Know the parts of your window
Before you start measuring, it helps to know the basic parts of a window. These are the key components you’ll need to identify to measure accurately.
- Frame: The structure that surrounds and supports the window, including the head, jambs and sill.
- Rough opening: The opening in the wall where the window and its frame fit. It’s typically slightly larger than the window itself to allow for installation and adjustment.
- Head: The horizontal part at the top of the window frame.
- Jamb: The vertical sides of the window frame. On a double-hung window, the jambs contain the tracks or liners that guide the sashes as they move.
- Sash: The part of the window that holds the glass. A double-hung window has two sashes that move up and down.
- Sill: The horizontal part at the bottom of the window frame. The sill supports the window and directs water away from the window opening.
Measurement tips for common window types
The type of window you’re measuring can affect how you take measurements, so determine which types you’re looking to replace and use the tips below to get accurate sizing.
Double-hung and single-hung windows
Double-hung windows have two movable sashes, so you can open both to the center of the window to access the sill and the head. After that, follow the general instructions above.
For a single-hung window, you’ll only have one movable sash. Open it to access the sill, then use the exposed part of the head in front of the immovable top sash for accurate height adjustments. When measuring width, use the exposed jamb in front of the immovable sash for the top and middle measurements.
Casement and awning windows
Casement and awning windows have sashes that open outward, so you’ll need to open the window fully to get accurate measurements.
Take measurements where the sash contacts the jambs, sill and head. You’ll likely need to remove the screens to access these areas from inside your home.
Sliding windows
Sliding windows can make width measurements challenging because the sashes are often in the way. If you can remove the sashes, that’s best.
If not, measure from the left jamb to a point on one sash, and mark that point with tape or pencil. Then, measure to that same point from the other jamb, and add the two measurements together. Repeat at the top, center and bottom of your window.
Picture windows
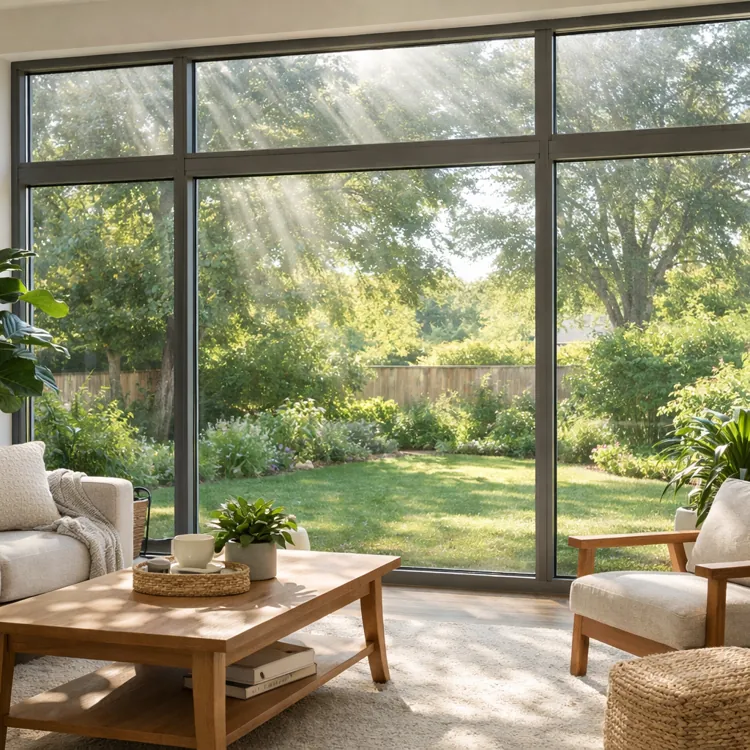
Measuring for picture windows can be confusing because there are no movable sashes, so you’ll need to measure around the existing trim.
Inspect your window and look for the first piece of trim that covers the edges of the glass. That’s usually the equivalent of a sash, so take measurements just outside those frame pieces. When in doubt, hire a professional to measure picture windows, since it’s easy to make mistakes.
Bow and bay windows
Bow and bay windows consist of multiple windows and can complicate measurements even further. Take individual measurements of each section, which usually consists of picture and casement windows. You’ll also need measurements of the entire wall opening to ensure a good fit, so measure between the head and the sill for height and between the jambs for width.
For these more complex windows, it’s also best to hire a professional. They’ll usually include measurements in the replacement cost, making it the best way to avoid mistakes.
Common mistakes
Even if you know how to measure for replacement windows, it’s easy to make mistakes that lead to inaccurate measurements and improperly sized windows, which can increase your window replacement costs.
Here are some common mistakes to avoid for a smooth measurement, ordering and installation process.
- Including trim in measurements: A common mistake is assuming the trim around your windows is part of the frame and measuring from edge to edge. This will lead to replacement windows that are far too big to fit inside your existing wall openings.
- Taking single width and height measurements: Measuring in only one place can miss a window frame that isn’t perfectly square. Take three width and three height measurements at different points to account for variations in the opening.
- Using largest width or height measurement: Using the largest of your three measurements can result in windows that are too big for the openings. You can shim slightly undersized windows, but oversized windows won’t fit.
- Failing to check that your windows are square: Replacement windows will be perfectly square, so they may not fit an opening that isn’t, even if it's the right size. Always measure corners and have a professional account for differences of more than 1/4 inch.
- Rounding up: Round to the nearest 1/16 inch when measuring windows, and avoid rounding up to avoid replacement windows that are too large for your wall opening.
- Using an old tape measure: The hook on tape measures can loosen over time, which can lead to inaccurate measurements across all faces of your window. Use a relatively new tape measure with a steel ribbon for the best results.
- Failing to measure each window individually: Some homeowners measure one window and assume others that appear the same size are identical. Always measure each window individually and check each for square rather than eyeballing it.
The best window companies usually include measurements in their window replacement estimates. If you’re going to have a professional install your new windows, let them do the measurements, too. This will save you time and could help you avoid the mistakes above.
FAQ
Are replacement windows measured from the inside or outside?
You can measure most replacement windows from either side, but some window types are easier to measure from one side than the other. For casement and awning windows, open the sashes and remove the screens before measuring from inside. Hopper windows are often easier to measure from outside because their sashes open inward.
Is it cheaper to replace all windows at once?
Yes, it’s usually cheaper to replace all your windows at once because manufacturers often offer a small discount per window when you order in bulk, and many installers offer a discount on installation labor for larger projects. Your total cost will, of course, be much higher if you go this route, but you’ll typically save per window.
What is the minimum jamb depth required for replacement windows?
The minimum jamb depth required for replacement windows is usually 4 9/16 inches. This accounts for the thickness of standard 2-by-4 framing (3 1/2 inches), plus the thickness of interior drywall, exterior siding and a little extra for tolerance.
If your jamb is thinner, which is sometimes common on manufactured homes, you’ll likely need custom windows. If it’s thicker, your window installer will need to add a jamb extender.
Do you measure replacement windows before or after removing old windows?
You should always measure replacement windows before removing the old ones.
Getting measurements is just the first step toward replacement. You’ll need to order windows, wait for your manufacturer to build and deliver them, then schedule installation. This process can take weeks from start to finish, so keep your old windows in place until your installer is ready to install the new ones.
Article sources
ConsumerAffairs writers primarily rely on government data, industry experts and original research from other reputable publications to inform their work. Specific sources for this article include:
- U.S. Department of Energy, Office of Energy Efficiency and Renewable Energy, Building Technologies Program, "Measure Guideline: Wood Window Repair, Rehabilitation, and Replacement." Accessed Sept. 14, 2026.
- U.S. Department of Energy, Office of Energy Efficiency and Renewable Energy, "How To's for the Handy Homeowner: Repairing Windows & Doors." Accessed Sept. 14, 2026.