Gather essential packing materials
The packing materials you’ll need to get depends on the type of computer or electronic device you have.
You might need to purchase:
- Heavy-duty boxes in various sizes: To pack electronics safely, you’ll need double-walled cardboard, which some shipping and moving companies call electronics boxes. Small boxes are typically suitable for tablets. Medium boxes can be used for keyboards and mice. They also work well for laptops and standard-sized PC towers. For larger electronics, like standard monitors and gaming PC towers, you’ll need a large electronics box. If you have an ultrawide monitor (34 inches and up), you can use a TV box.
- Packing peanuts: Use these to fill any empty space inside the box. This will prevent the item from shifting.
- Antistatic bubble cushioning wrap: It’s essential to provide a layer of cushioning around your electronics to absorb shocks during transit. It also keeps static electricity from building up, which can damage internal components.
- Packing tape: This will seal and reinforce your box.
- Painter’s or masking tape: It can be easy to forget which cords belong to which device when moving. You can label them to make setup in the new location easier.
There are also some common household items you’ll need to have on hand, including scissors. Cords can easily get tangled and lost during the move, which is why it’s a good idea to secure them with twist ties or rubber bands. Labeling your cords with painter’s or masking tape and a permanent marker can make it easier to set up your electronics once you get to your new location.
» RELATED: How to pack fragile items
Disassemble and prepare your computer
Before disassembling your computer, back up the data on your hard drive to protect your data and give you access to important files during the move. There are two common ways to do this: either an external hard drive or cloud storage. Be sure to save items you might need immediately, such as financial records or personal documents.
Once your data is secure, you can begin the disassembly process by properly shutting down your computer or laptop. Next, disconnect all cords, cables and peripherals (like your monitor, mouse and any external hard drives).
To simplify reassembly, use painter’s tape to label each cord with its corresponding connection location before coiling it, securing it with a twist tie and placing it into a plastic bag. Label the outside of the bag with “Computer Cables”.
Finally, for desktop computers, you may take the extra precaution of removing the graphics card and hard drive before packing. Be sure to ground yourself by touching an unpainted metal object first to get rid of any static electricity.
» LEARN: Best packing tips
Wrap and cushion your components
You’ll need to wrap all computer components in antistatic bubble cushioning wrap. Start by placing the computer tower in an upright position on a sturdy table or surface. Then use the antistatic bubble cushioning roll to completely cover the tower with two to three overlapping layers on all sides with the bubbles facing inward toward the tower.
After wrapping, tightly secure the bubble cushioning wrap using packing tape to ensure the layers do not shift or unroll during transit.
The computer monitor should be packed separately from the tower to prevent cracking. Carefully remove the monitor stand, if possible, and wrap it separately in multiple layers of antistatic bubble cushioning wrap.
For the screen itself, it's a good idea to add an extra layer of protection directly over the display by placing a small piece of cardboard over the surface before you begin wrapping and securing it with packing tape, being careful not to get any tape on the screen itself.
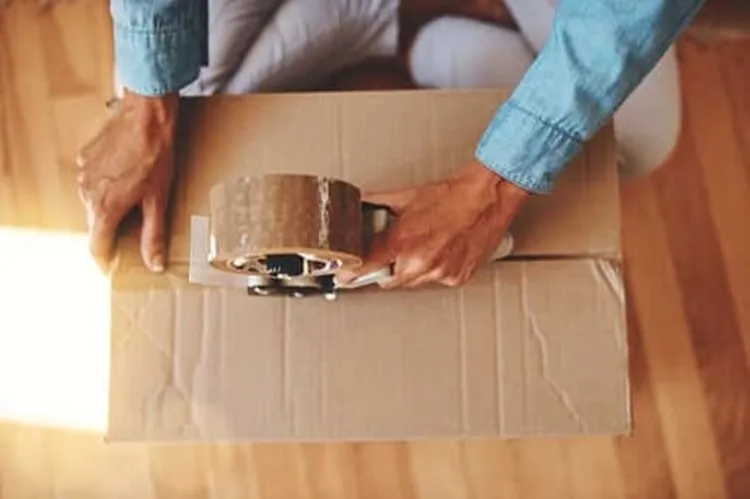
Box and secure your computer
Cut a few sheets of bubble cushioning wrap and place them at the bottom of a heavy-duty box, creating a base layer of cushioning. Gently place the wrapped tower into the center of the box, making sure it remains upright.
Next, fill in the empty space completely with packing peanuts. The tower should not be able to shift or move inside the box during transit. Remember that peanuts often create static, so it’s important to make sure your tower is covered with the antistatic wrap.
Then, securely seal the box with heavy-duty packing tape and clearly label the exterior with both “FRAGILE” and “THIS SIDE UP.”
Repeat the process, packing the computer monitor, which will need to be in its own separate box, upright. Laptops should be protected with antistatic bubble cushioning wrap and placed into a box with a snug fit. Also, individually wrap internal components and peripherals, placing them into a separate box to prevent potential damage.
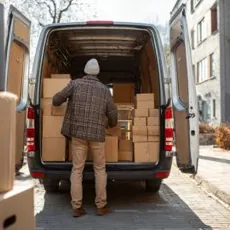
Transport and reassemble your computer
If you want the safest transportation for your computer, it’s best to avoid a large moving truck. Instead, bring your carefully packed electronics boxes with you in a personal vehicle. Smaller cars or trucks generally provide a smoother ride with less jostling over road bumps, keeping the delicate components inside your computer and monitor safe.
The best spot to place your computer boxes is on the floorboard behind the passenger seat, rather than in the trunk to avoid intense fluctuations of heat or cold.
Once placed, adjust the passenger seat forward just enough so that the box sits securely and remains upright. The goal is to fill the space and prevent the box from shifting or sliding with every stop and start, minimizing any internal shock to the components. Maintain a moderate air temperature in the vehicle, and don’t leave the boxes in the car for extended periods of time without running the air conditioner or heater.
As soon as you reach your destination, take the computer boxes into your home right away. Electronics require an acclimation period of about 24 hours to adjust to the new ambient temperature. After 24 hours, you can unpack the components and reconnect the cables.
FAQ
Is Bubble Wrap safe for packing a PC?
For packing computer components, use only antistatic bubble cushioning wrap, which is specifically designed to protect sensitive electronics. Using standard Bubble Wrap is unsafe and could potentially damage your hardware.
Can I lay my PC on its side for transport?
No, you should keep your PC tower in an upright position as you wrap it in antistatic bubble cushioning wrap and load it into the moving box. Leaning the tower on its side could damage internal components.
Will UPS pack my PC for me?
Yes, UPS offers specialty packing services for electronics, including PCs and laptops. However, this service is only available if you are shipping your computer through UPS.
How do I prevent static damage during packing?
Before touching computer parts, remove static electricity buildup by touching an unpainted metal object or wearing antistatic gloves. You’ll also need to use antistatic bubble cushioning wrap on your packed electronics.
Article sources
ConsumerAffairs writers primarily rely on government data, industry experts and original research from other reputable publications to inform their work. Specific sources for this article include:
- U-Haul, “Using Heavy-Duty Boxes for Moving.” Accessed November 10, 2025.
- U-Haul, “How to Pack a Computer for Moving or Shipping.” Accessed November 10, 2025.
- ClearBags, “How to Use Static Shield Bags.” Accessed November 10, 2025.
- Moving.com, “The Smart Way to Move a Computer to a New Home.” Accessed November 10, 2025.
- Olympia Moving, “How to Pack a PC for Moving: A Step-by-Step Guide.” Accessed November 10, 2025.
- Premier Protective Packaging, “Which Side of bubble Goes Inside? How to Use bubble.” Accessed November 11, 2025.
- AT Movers, “Pack Your Monitor for Safe Moving or Storage.” Accessed November 11, 2025.
- UPS, “How To Ship a Laptop.” Accessed November 12, 2025.
- Moving.com, “How to Transport a PC in a Car.” Accessed November 12, 2025.
- Bekins Van Lines, “Protect Your Belongings During Your Winter Move: Electronics, Instruments & Valuables.” Accessed November 12, 2025.
- UPS, “Packing Services.” Accessed November 12, 2025.