Preparing for the move
First, carefully measure the height, width and depth of the desk to ensure it can fit through all doorways, hallways and staircases along your moving path.
Once you have the desk's dimensions, walk the entire route from the desk's current location to the moving truck. Measure the width of any doorways, as these are often the narrowest points you will encounter.
After confirming the desk will fit, gather the following supplies:
- Furniture dolly: This is essential for moving a bulky desk. You may need two, depending on the desk's weight and length.
- Hand truck: An upright, two-wheeled dolly that is excellent for navigating tight spaces, turns and stairs with the desk positioned on its end.
- Heavy-duty furniture sliders (optional): These can be used if a dolly is unavailable. Ensure you purchase the correct type for your flooring (plastic for carpet, felt for wood surfaces).
- Lifting straps (optional): Useful if you need to carry the desk up or down a staircase with a helper, or if you don’t have access to sliders or a dolly.
- Moving blankets: For protecting the desk's surface, as well as walls and door frames.
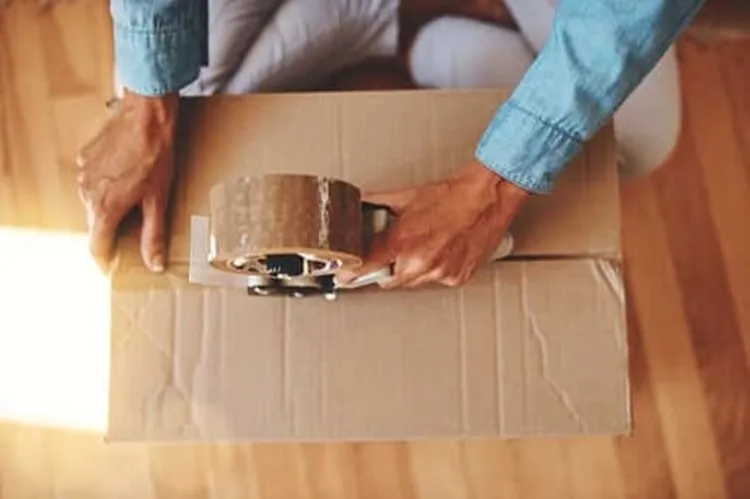
- Stretch wrap: To securely hold the moving blankets in place around the desk.
- Protective floor coverings: Use plastic film for carpets and red rosin paper for wood floors. Cardboard can also be used to cover walls in tight spots.
- Painter’s tape: To secure floor and wall coverings without damaging surfaces.
- Tools for disassembly: Include flat-head and Phillips-head screwdrivers and an Allen wrench in case the desk needs to be taken apart.
- Sealable bags: For organizing and storing all hardware and screws from any disassembled parts.
- Permanent marker: To clearly label the bags of hardware or any secured parts.
- Plywood (optional): To create a ramp on outside steps.
» RELATED: Best moving companies
Disassembling the desk
You may need to remove some of the desk’s components to make it lighter and easier to fit through narrow spots. First, check if the desk is designed to be taken apart, especially if it is a ready-to-assemble (RTA) model, and look for the manufacturer's instructions. Keep in mind that heavy, solid wood desks may only allow for the removal of drawers.
If full disassembly is possible, start by emptying all contents from the drawers, then remove the drawers and any other easily detachable parts. Work on the disassembly from the top down: unscrew and remove the desk's surface before proceeding to the rest of the structure, and finally, remove handles and other small hardware.
As you disassemble, organize all components for easy reassembly later. Place all screws and small hardware into a sealable bag and label it clearly (e.g., "Desk Top Screws"). For larger components, use painter's tape to label the parts (e.g., "Left Side Panel" or "Back Support"), which also makes it easier to track the order of disassembly. You may also use painter's tape to secure similar large parts or wooden planks together before wrapping them in stretch wrap for the move.
» DO IT RIGHT: How to pack for a move
Using the right tools
Once the desk is prepped, you can use specialized tools to move it safely. The best tool depends on the desk's size and the path you are taking.
A furniture dolly (especially a long one for wider desks) is a useful tool as it bears the desk's weight, saving strain on your back as you move it. You can use a hand truck to temporarily lift one end of the furniture, making it easy to slide the dolly underneath. For long desks, you may need to use two dollies, with one positioned at each end.
Furniture sliders can help maneuver the desk across interior floors, but remember that you will need other tools (like a dolly or hand truck) to get the desk outside and onto the moving truck.
To use sliders, have a helper slightly lift one end of the desk while you carefully place a slider under each foot or corner. Once all four corners have sliders, you can push the desk across the floor toward the nearest exterior door. Never place your fingers underneath the desk when positioning the sliders.
If dollies are unavailable and you and a helper can safely manage the weight, lifting straps are an excellent alternative. They help you maintain good lifting posture by redistributing the weight more effectively to your legs.
Follow these safety tips if you use lifting straps:
- Wear non-slip, closed-toe shoes for maximum stability.
- Ensure the strap harness fits properly and is snug against your body.
- Keep the load as close to your body as possible.
- Pivot using your feet and avoid twisting your back to turn or change direction.
» MORE: How to move heavy furniture
Lifting and moving techniques
Assess the desk’s weight and compare it with your physical capabilities and load capacity before attempting to lift it. Hiring professional movers may be the safest option for extremely heavy furniture. If you decide to move the desk yourself with a helper, always use proper lifting technique to prevent injury.
To lift safely, squat down, keep your back straight and push up with your powerful leg muscles, never relying on your back to carry the weight. When navigating tight spaces, such as narrow hallways, always assess the path before you lift the desk, as you may need to plan for a slight rotation to clear turns.
Moving the desk downstairs requires extreme caution. Proceed slowly, taking only one step at a time, and ensure the stronger person is positioned on the bottom to bear the majority of the load. Continuous communication with your helper is important; clearly call out instructions, such as "one, two, three, step," before moving.
To ensure a smooth and safe move, avoid these common mistakes:
- Inadequate planning: Failing to take the time to plan the route and assess all obstacles (like tight corners or door widths) beforehand.
- Improper lifting technique: Using your back instead of your legs, which can lead to serious injury and potential damage to the property.
- Not protecting floors or walls: Neglecting to use moving blankets, cardboard or plastic film, which results in scuffs and scratches if accidents occur.
Reassembling and settling in
Once your desk has been safely moved to its new location, the final step is to reassemble and organize your workspace.
If you disassembled the desk, begin by locating the manufacturer’s instructions and the labeled hardware bags you prepared earlier. In general, the reassembly process is the reverse of disassembly: you will typically assemble the frame and legs first, then secure the tabletop to the frame. Finally, reinstall the drawers and any handles or hardware. Always check for complete stability and tightness of all screws and fasteners before loading the desk with your items.
An organized desk ensures maximum efficiency and a clutter-free environment:
- Prioritize placement: Keep frequently used items (such as pens, notepads or a stapler) in an organizer directly on the desk's surface for easy access. Store items used less frequently in drawers, but organize them clearly by category (e.g., dedicated drawers for files, extra office supplies and personal items).
- Utilize drawer inserts: Use small containers, trays or drawer dividers within your drawers to keep tiny items (like paper clips, staples, rubber bands or charging cables) neatly separated and prevent them from rolling around.
- Go vertical with risers: Stack monitors or printers on specialized risers or stands. This elevates the equipment to a more ergonomic height and utilizes the empty space underneath to store flat items like paper stacks, keyboards or small notebooks.
- Manage cables: Use cable ties, clips or sleeves to bundle and route charging cords and power cables neatly under the desk or along the back edge to keep the surface clear.
FAQ
What is the easiest way to move a heavy desk?
The simplest way to move a heavy desk yourself is to disassemble it. Remove heavy drawers and any protruding hardware to ease passage through narrow spots. Also, use moving aids like a furniture dolly or sliders to protect your back from heavy lifting.
How to move a heavy L-shaped desk?
Begin by separating the two sections of the L-shaped desk. Removing the tabletops from the frames or legs will make the parts easier to handle and fit through narrow doorways.
How to move an extremely heavy object?
Always use tools like dollies, sliders, or lifting straps when moving heavy furniture. You will also need a helper to safely share the load.
What things will movers not move?
Moving companies generally handle all heavy furniture. However, some may refuse to move items requiring specialized care, such as pianos, marble tabletops, hot tubs or pool tables, or charge extra for doing so.