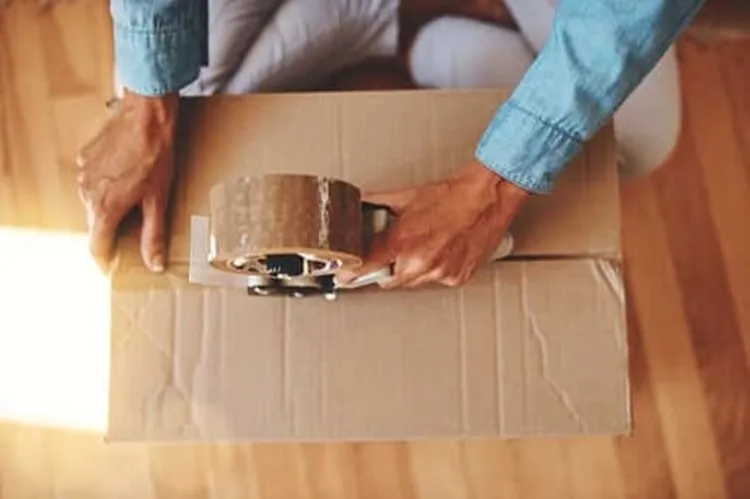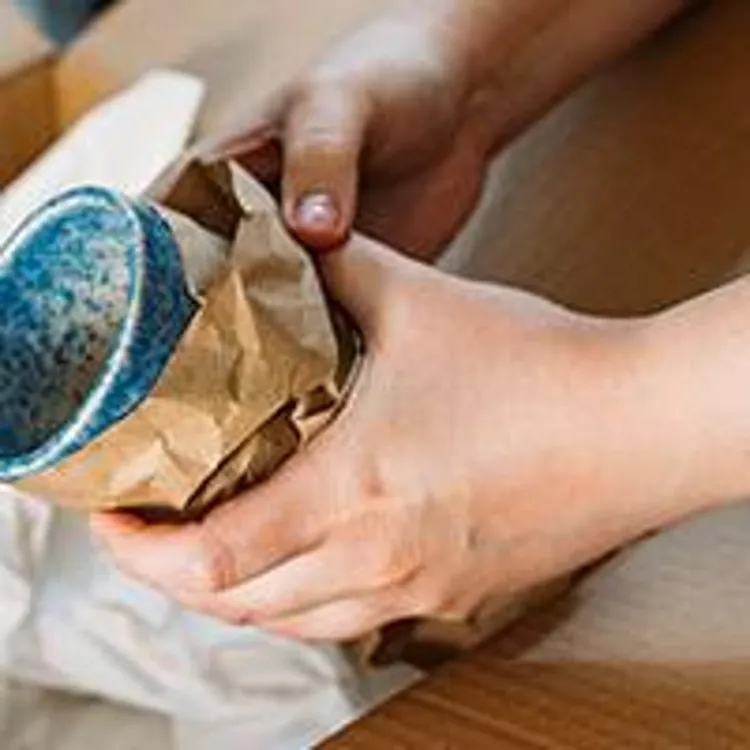
Fragile items, like dishes, should be individually wrapped before going in a moving box.
Jump to insightHave a plan for when to pack up kitchenware, and allow yourself several hours to complete the task.
Jump to insightConsider purchasing specialty moving items, like heavy-duty boxes or box dividers, to pack especially fragile items.
Jump to insightHow to pack plates, bowls and platters
You can use packing paper or bubble wrap to pack plates, bowls and platters. Some hardware stores even sell foam envelopes or rolls of foam, which is especially good for packing dishes.
Plates
With plates, it’s important to wrap each one individually.
- Sort plates by size and create stacks. For example, put large dinner plates in one pile and small lunch plates in another.
- Grab a stack of similar-sized plates to begin wrapping.
- Cut a piece of packing paper or bubble wrap into a square that’s about double the size of the plates.
- Place a single plate in the middle of the square. If you’re using bubble wrap, turn the square so that the bubbles are facing inward toward the plate (this offers added protection). Fold each corner of the paper or wrap to the middle of the plate and fold all sides into the center. Secure with a piece of tape.
- Repeat this process until all plates are wrapped.
If you’re packing stacks of plates, follow these steps:
- Gather three or four similar-sized wrapped plates and stack them on top of each other.
- Cut another piece of packing paper or bubble wrap into a square large enough to wrap around the stack of dishes. If you can’t cut a shape large enough to fold all edges inwards, you can cut smaller strips of packing paper or bubble wrap to secure in the center of the stack. This will fill in the empty space.
- Put the paper or wrapping material on a flat surface and place the pile of dishes in the center. Fold the corners and the edges of the material to the middle of the stack. Secure with a piece of tape.
- Grab a small box and place a layer of bubble wrap at the bottom (packing paper can work if you add multiple layers).
- Place a wrapped stack into the box vertically. You can add multiple stacks to the container until there’s no extra space, but keep in mind how heavy the box may become. You want to keep it light enough for someone to carry and place down gently.
- Fill in any empty space with more bubble wrap or balls of crumpled packing paper. This will keep the dishes from moving around in the box during transit.
- Close the top of the box and secure it with packing tape. Label the box “fragile” and include the type of item (e.g., dishes) and the room location (e.g., kitchen). If you’re using a moving company, this will be helpful for movers — they’ll know where the boxes will go without having to ask. You’ll also want to label the top of the box with “this side up” and an arrow.
» MORE: How to pack for a move
Bowls
You’ll use a similar process to pack up bowls. Gather similar-sized bowls, and then wrap each one individually before wrapping a small stack together. Depending on the size of the bowls, the stacks may fit perfectly in the empty spaces of the box for plates. Just follow the same steps by placing wrapped stacks of bowls vertically into the container and filling any space with additional paper to limit movement.
Platters
Serving platters tend to be larger and heavier than dishes and plates — depending on how many platters you have, you may need to pack them in a separate box. Wrap each platter individually, paying careful attention and covering all sides with paper or bubble wrap. You may need to use multiple pieces of paper or bubble wrap to cover the platter. Secure with a piece of tape in the middle of the platter.
Unlike other dishes, you won’t need to create a stack of platters and rewrap them. However, you can use the same packing techniques otherwise. Line the bottom of the box with extra paper or bubble wrap, then stack wrapped platters on top. Fill in empty spaces with additional paper, then secure and label the box.
» DO IT RIGHT: How to pack a moving truck
How to pack glasses and glassware
Glasses may be a bit more difficult to wrap and pack than other dishes, especially if your glassware isn’t heavy-duty. One slight nick to the top of a cup could crack and shatter the glass. To make packing a little easier, you could buy a glass packing kit, which comes with foam pouches to wrap the glassware and dividers to place the glasses into the box separately. These kits aren’t necessary but may be helpful.
Standard glasses and cups
If you don’t have a glass packing kit, here’s how you can wrap and pack your glassware:
- Gather your glassware and sort by size and shape.
- Crumple a ball of paper or bubble wrap and place it inside the cup or glass. This gives it some extra padding.
- Lay out a sheet or roll of packing paper or bubble wrap. Lay the glass on its side and secure the paper to the side of the glass with tape.
- Roll the glass on its side until there’s paper or bubble wrap on all sides. Secure with tape.
- Fold in the paper to the top of the cup and on the bottom, then secure it with tape.
- Repeat the previous steps until all glasses are individually wrapped.
- Place a thick layer of packing paper or bubble wrap in the bottom of the box.
- Carefully set glasses upright in the box. You may be able to double-stack some glasses, depending on their size and shape (not delicate glasses). Continue to place wrapped glasses in the box until it’s mostly filled up.
- Fill in empty spaces in the box with additional crumpled packing paper or bubble wrap.
- Secure the top of the box with packing tape — label “this side up” and “fragile” where it can be easily seen. Also, include the type of item in the box and the room location.
Mike Glanz, the former moving division general manager of Porch Group, a moving concierge company, told us people tend to pack cups and glasses incorrectly.
“You should pack pint glasses and tea cups as pairs, oriented like shoes in a shoe box,” Glanz said. “Each should be individually wrapped, but you should also use larger sheets of packing paper to draw the breakables together into a tightly packed brick shape. This makes the breakables much more durable for even the most turbulent moves.”
Mugs and handled items
Coffee mugs and teacups are generally sturdier than glassware, but their handles are vulnerable to snapping.
- Wrap each mug individually, paying special attention to cover the handle with extra padding.
- After wrapping, mugs can be placed in rows inside the box. Depending on size, you may be able to double-stack mugs, but only if the bottom row is cushioned with an additional cardboard divider or extra wrap.
- Pint glasses and teacups can be packed as pairs. Wrap each individually, then secure the pair together with larger sheets of packing paper to form a compact, brick-like bundle.
Wine glasses and fine stemware
Wine glasses and fine stemware tend to be more breakable than other glasses, so you’ll want to use special care when wrapping them. If possible, you may want to use a dedicated moving box just for wine glasses. You may also choose to double-box, which means you’ll pack the wrapped wine glasses in a small box, then place it within a larger moving box.
Like with other glasses, you’ll wrap each wine glass individually. Double-wrap the glass stem so there’s an extra cushion for when it’s packed away in the box. Place wrapped glasses into the moving box in an upright position. If you’re using a smaller moving box, you can place a small piece of cardboard on top of the first row of glasses, then add another row on top. Box dividers may come in handy when packing this type of fragile item.
How to pack pots and pans
Depending on what type of pots and pans you have (e.g., ceramic, cast iron, stainless steel), it may not be necessary to wrap each one individually. However, ceramic coatings can be easily scratched if they come into contact with other hard surfaces.
- Gather pots and pans, then sort them into nesting groups. For example, a small saucepan and a large saucepan can nest together.
- Take the large saucepan (per our example) and line the inside with two sheets of packing paper. You could secure the paper with tape, but keep in mind that it may leave a slightly sticky residue on your pans.
- Place the smaller saucepan into the larger saucepan. Repeat the process if you continue to nest the pans.
- Once you have a nested group, wrap it with more paper or bubble wrap. Secure it with tape.
- Place a few sheets of packing paper or bubble wrap in the bottom of a moving box.
- Place wrapped pans in their upright position in the box. Continue to pack the box with nested groups until it’s mostly full. Be aware of the box’s weight as you pack it — cast-iron skillets tend to be much heavier than ceramic skillets, so you may need to pack those within their own box.
- Fill in empty space with packing peanuts or packing paper so the pots and pans aren’t able to shift much within the box.
How to pack other kitchen items
With other kitchenware, you might not need to be quite so careful. Still, there are a few techniques to help ensure your cooking utensils and small appliances are packed properly.
Utensils
As long as your utensils aren’t fine silver, you should be able to wrap groups of utensils together in paper (e.g., spoons can be wrapped together).Knives
Wrap kitchen knives individually in paper and label the box properly. If you have a knife block that separates each one, you could bubble wrap the block with the knives in it. Just secure each knife within the block with a piece of tape on the outside. If your knife block is heavy, you may want to pack it in a box by itself. Make sure the wrap is secured with heavy-duty packing tape.Small appliances
Small appliances, like toasters or coffee makers, should be packed in small boxes (use the boxes the items came in if you still have them). Often, the original packaging comes with a styrofoam insert that protects items during shipping. If you don’t have the originals, just line a small box with crumpled packing paper. Place the appliance inside and fill the empty space with more paper or bubble wrap.Packing supply list
You can spend quite a bit of money on packing supplies if you wish, but you can also find some items, like moving boxes, free around town.
- Packing tape with a roller or dispenser: The dispenser isn’t required, but it makes securing boxes much easier and faster to complete.
- Moving boxes: You’ll need boxes in all sizes (small, medium and large). You could get free boxes from grocery stores or retail stores, but not all boxes are made to pack fragile items. For glassware and dishes, consider purchasing heavy-duty moving boxes designed to hold the weight of these items.
- Wrapping supplies: Bubble wrap, packing paper and packing peanuts are optional, but they can be used to fill in empty spaces. Bubble wrap tends to be more expensive than packing paper.
- Scissors: You’ll want some good scissors to cut packing paper, bubble wrap, tape and labels.
- Dark-colored permanent marker: It’s a good idea to have a bold permanent marker on hand to label each box with the contents and the room it’s going to.
Additional packing tips
Packing yourself can feel like a huge undertaking. Here are a few more tips to help you make it to moving day.
- Make a packing plan: Make a plan for packing so you aren’t stressed at the last minute. For example, you can plan to pack up most items in the kitchen by a certain date, but leave a few dishes and utensils to eat with for the last few days. Or you can pack it all away and use disposable plates and cutlery until moving day.
- Plan for extra time in the kitchen: Allow yourself plenty of time to pack the kitchen. It’s likely the room in your house with the most fragile items, so it may take more time to pack up. Packing this room little by little over a few days may make this task less stressful.
- Find child care: If you have small children living with you, consider getting a babysitter for the time you plan to pack away the kitchen. It may reduce distractions and help you get the job done faster.
- Know what services you’re paying for: If you decide to hire movers, make sure you know exactly what services you’re receiving (e.g., packing and/or moving).
Vivek of San Jose said this on our site about the service they got: “The delivery was fine but … there was some sort of confusion. I took the comprehensive package where they pack and ship everything. But when they got there, they said that they were not gonna do any of the dishes and utensils. So, I had to pack them all by myself and hand it over to them, which wasn't fun at all.”
» MORE: How much do movers cost?
FAQ
Is bubble wrap or paper better for packing?
Bubble wrap will offer more protection for your fragile items. However, it isn’t as lightweight as paper, so you won’t be able to stack as many dishes in the box. It’s also more expensive. You may consider having both supplies on hand and using the bubble wrap for more delicate items, like fine china or wine glasses. You could use the packing paper for everyday dishes and glasses. Just make sure you wrap each item individually.
How do you pack dishes for moving without paper?
It’s possible to use clothing and other fabrics to wrap dishes. However, while fabrics may offer more cushion than paper, it takes up more space in the box. It’s also harder to secure once an item has been wrapped (with paper, you can tape the middle). You could use a combination of packing paper and fabrics to pack boxes. For instance, you could use clean socks to stuff the inside of wine glasses, then wrap each glass in paper Or, you could use lightweight towels to fill in the empty spaces of a packed box.
Should you pack dishes vertically or horizontally?
Dishes should be packed vertically, with the bottom of the dish facing the bottom of the moving box. A dish packed horizontally is much more likely to break from moving in the box during transit.
Should you wash dishes after moving?
It’s a good idea to wash your dishes after you’ve unpacked them. A dish’s surface is likely to collect germs and dust from the move and from unpacking. As you unwrap each dish, place it directly into the dishwasher to expedite the cleaning process.
» MORE: How to unpack after moving
What are common mistakes people make when packing dishes?
Some frequent mistakes include stacking dishes horizontally instead of vertically, failing to wrap each item individually, leaving empty spaces in the box that allow movement, overpacking heavy boxes that are hard to carry and forgetting to label boxes clearly as fragile.
Article sources
ConsumerAffairs writers primarily rely on government data, industry experts and original research from other reputable publications to inform their work. Specific sources for this article include:
- The Home Depot, “How to Pack Dishes and Glasses.” Accessed Aug. 26, 2025.
- Martha Stewart, “How to Pack Dishes and Other Delicate Kitchen Items When Moving.” Accessed Aug. 26, 2025.
- Coldwell Banker, “The Correct Way to Pack Wine Glasses for a Move.” Accessed Aug. 26, 2025.