Packing a printer for moving requires removing ink or toner, securing moving parts, boxing it for protection and keeping accessories together.
Jump to insightYou need a sturdy box, residue-free tape, interior packing like cardboard or foam, labels and plastic bags to pack a printer for moving.
Jump to insightLong-distance moves can harm printers due to temperature changes and rough handling. Place boxes flat and secure, use personal vehicles if possible and follow mover instructions.
Jump to insightHow to pack a printer for moving in 6 steps
With over 22 million people working from home, printers are common home office accessories. Still, printers are often tossed into a box as an afterthought during moves. Ink cartridges, ink heads and other moving parts can be easily damaged during moves.
Understanding how to pack a printer for moving ensures your equipment works properly once you reach your new home.
1. Remove ink or toner
Begin by removing the ink or toner cartridge from your printer. For toner cartridges, place them in a large sealable plastic bag. For inkjet cartridges, place each cartridge in an individual bag and store them in a small box, preferably upright.
2. Power down and disconnect everything
Before powering down, be sure your printer doesn’t require the head to be parked. Most inkjet printers will automatically park the print head as it powers down; however, a few may require an additional shutdown step outlined in your manual. If you’ve lost or thrown away the manual, most manufacturers, such as HP or Epson, have printer manuals online.
If no additional parking step is required, turn off your printer. If it is a battery-powered printer, remove the batteries and set them aside. If the batteries were already low, set them aside for recycling or other disposal.
3. Organize and remove cables
Once your printer is powered down, take a moment to label cables before removing them. This is especially important if you are moving multiple printers. Use painter’s tape or cable labels to mark the printer and cable type. For example, “John’s inkjet: power” or “Marketing laser: power.” Add a matching label to the printer with the printer name.
After labeling, remove and neatly coil cables, securing with cord keepers, fabric fastener or painter’s tape. Set cables aside to be packed with their respective printer.
4. Secure trays and moving parts
Remember when you got your printer? There were plastic bars, tape and foam in the printer. Those bits kept moving parts immobile for shipping. Before moving your inkjet or laser printer, you need to recreate that packing if you didn’t save it when you bought the printer.
A quick way to get an idea of what needs to be secured is to check the “Quick Start” section of your printer manual, which shows how to remove the original packaging. That way, you can see where the printer needs support. Using those diagrams as a guide, secure any moving parts and empty spaces that need support.
Foam, cushioning material and even fabric work well to fill larger voids, while painter’s tape works well to secure movable parts without leaving residue behind.
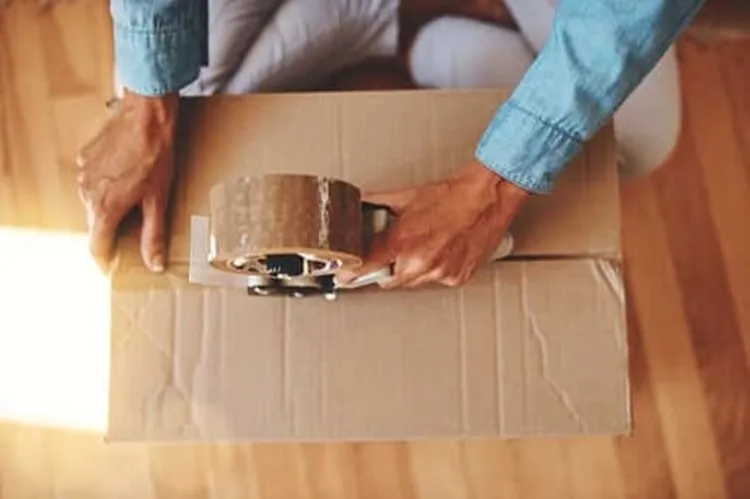
5. Box the printer
Packing for a move isn’t complicated, but you do need to choose materials based on what you are packing. If you saved the original packaging, your printer should fit securely within it. If you did not, you’ll need to choose a sturdy replacement box and add cushioning.
A heavy-duty moving box with several inches of space on all sides usually works for a single printer. Use cushioning material, crumpled packing paper or foam to support the printer. Place the printer on a flat surface, using cardboard if needed.
If you are moving multiple printers, consider getting some room-temperature expanding foam. This foam is enclosed in a plastic bag and will expand to fit your printer when activated.
Secure the box with packing tape and tape your ink or toner box on top. If you use movers, ensure you are allowed to tape boxes together.
Remember to add printer cables on top of your printers before sealing the box.
6. Label the printer
Label your printer with the intended room and the printer type. Also, add notes stressing fragility, such as “Handle with care” and “This side up.” If you are using a professional moving company, ask if “Fragile” stickers are provided. Follow any mover directions for label positioning. If no instructions are provided, be sure to label multiple sides.
For self-moves, or if you are transporting the printer in your own vehicle, “Fragile” labels are less important than labels indicating the contents and the room the box will go to in your new home or office.
Packing materials for moving a printer
During the hustle of getting multiple moving quotes, negotiating with movers and the rush to pack, it’s easy to forget proper supplies. While specialized packing materials add to the cost of a move, they can prevent printer damage and save money overall.
Packing supplies might include:
- Boxes: Original boxes are best, but heavy-duty moving boxes with about 6 inches of space on all sides work well and help insulate the printer during shipping.
- Printer packaging: The original packaging is ideal, but painter’s tape, small bits of foam or even fabric can protect printer parts.
- Box filler material: Cushioning material, foam or expanding foam packs work well. Avoid material that may crumble and leave pieces inside the printer.
- Plastic bags: Secure ink cartridges and toner in plastic bags to prevent spills. For ink cartridges, you may find that taping a piece of plastic over the ink opening adds an extra layer of protection.
- Fabric fastener and painter’s tape: Using painter’s tape to secure movable printer parts won’t leave residue. You can also use painter’s tape for labeling cables, and fabric fastener is useful for securing cable bundles.
- Labels: Self-printed shipping labels or preprinted specialty handling labels help protect your printer. Label boxes with “This side up,” “Electronics,” “Fragile,” your name and which room the printer goes in after the move. If hiring professional movers rather than moving items yourself, check with your mover for labeling requirements.
Transport tips for long-distance moves
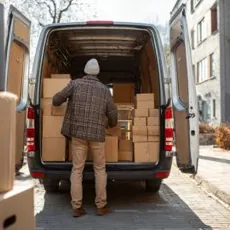
For long-distance moves, extended transit times pose risks for printers and ink. Long periods of time in nontemperature-controlled moving trucks, storage containers or personal vehicles can damage electronics. For example, condensation can form when moving from cold to warm environments, which poses a risk to electronic devices.
Box positioning also matters. Printer boxes should be placed on a level, flat surface, without other boxes stacked on top of them. The boxes also need to be secured so they don’t slide around. You may find moving your printers in your personal vehicle more reliable than sending them on a moving truck.
When using a professional mover, be sure to follow the mover’s box-labeling instructions and check with the mover about how electronics are handled.
How to move a printer long distance:
| Do | Don’t |
|---|---|
| Take printers with you in personal vehicles if possible. | Place printer boxes under other boxes. |
| Place printer boxes on stable, flat surfaces. | Turn printer boxes upside down or on their sides. |
| Secure boxes so they don’t slide around during transport. | Leave printers in high humidity or temperature extremes. |
| Tape inkjet or toner cartridges to the top of the box to avoid losing them during the move. | Pack inkjet cartridges in the same box as the printers. |
| Do | Take printers with you in personal vehicles if possible. | Place printer boxes on stable, flat surfaces. | Secure boxes so they don’t slide around during transport. | Tape inkjet or toner cartridges to the top of the box to avoid losing them during the move. |
| Don’t | Place printer boxes under other boxes. | Turn printer boxes upside down or on their sides. | Leave printers in high humidity or temperature extremes. | Pack inkjet cartridges in the same box as the printers. |
» MORE: Best moving containers
Setting up the printer after moving
Once your things arrive at your new home, begin unpacking. Though you might feel tempted to rip open boxes and unpack as quickly as possible, taking a step-by-step approach ensures your printer works correctly.
1. Inspect boxes and remove packing materials
When using a professional moving company, it’s important to inspect the box for damage before you do anything else. Following your moving company’s requirements for damage claims, document any potential issues such as wet or dried water spots, as well as dented, torn or open boxes. Next, inspect the inside of the box, then finally the printer itself.
When removing packaging materials, take your time. Carefully remove tape and other materials to avoid damage to the printer or leaving pieces of packaging such as foam behind.
2. Reconnect cables and reinstall ink or toner
Using your labels, reconnect the cables to the printer, power and your computer or router. Note that some printers may require different steps. Follow the manufacturer's directions for installation.
Unpack ink or toner cartridges. Dispose of any that did not survive the move. If your printer allows it, reinstall the ink and toner now. Some printers may need to be powered on first before the printer head can be moved into the installation position.
3. Turn on the printer
If your printer was exposed to extreme temperatures during the move, give it time to acclimate before powering it on. If it needs to acclimate, leave it open to help with any moisture evaporation from condensation.
Once the printer has acclimated, follow the manufacturer’s instructions to turn it on. Install the corresponding software on your computer and update it if needed. Then connect the printer to your Wi-Fi if it is wireless.
If your printer requires power before installing ink or toner, you can install it now.
Printers and other electronics usually need about 24 hours to adjust to a new temperature.
4. Run cleaning and alignment cycles
After powering on, run any available cleaning and alignment cycles from your printer software. Watch and listen for the irregular movement of any components. If the printer hangs up or just doesn’t sound right, open it back up and check for missed packaging pieces or components that are out of place.
5. Test print and troubleshoot
Some printers combine test prints and alignment together. If yours doesn’t, run several test prints after cleaning and aligning. Look for issues such as error messages and streaking.
Troubleshooting error messages generally requires following prompts on your computer or the printer's display to resolve them. Streaking could indicate issues with toner or ink cartridges during the move.
FAQ
Can you lay a printer on its side when packing or storing it?
Do not lay your printer on its side. The moving parts in a printer can shift out of position when extra pressure is applied to delicate parts, especially when not stored right side up.
How do you pack an HP printer for moving?
HP printers can be packed using the steps above and by following the HP “Quick Start” instructions as a guideline to see what parts of the printer need support and taping down.
Should you remove ink cartridges before moving a printer?
Always remove ink cartridges before moving an inkjet printer to help avoid spills and leaks.
How do you prevent ink leaks when moving a printer?
To prevent leaks when moving an inkjet printer, remove the cartridges and store each in an individual plastic bag.
Article sources
ConsumerAffairs writers primarily rely on government data, industry experts and original research from other reputable publications to inform their work. Specific sources for this article include:
- United States Census Bureau, "Socioeconomic Inequalities Between Remote Workers and Commuters." Accessed May 12, 2026.